
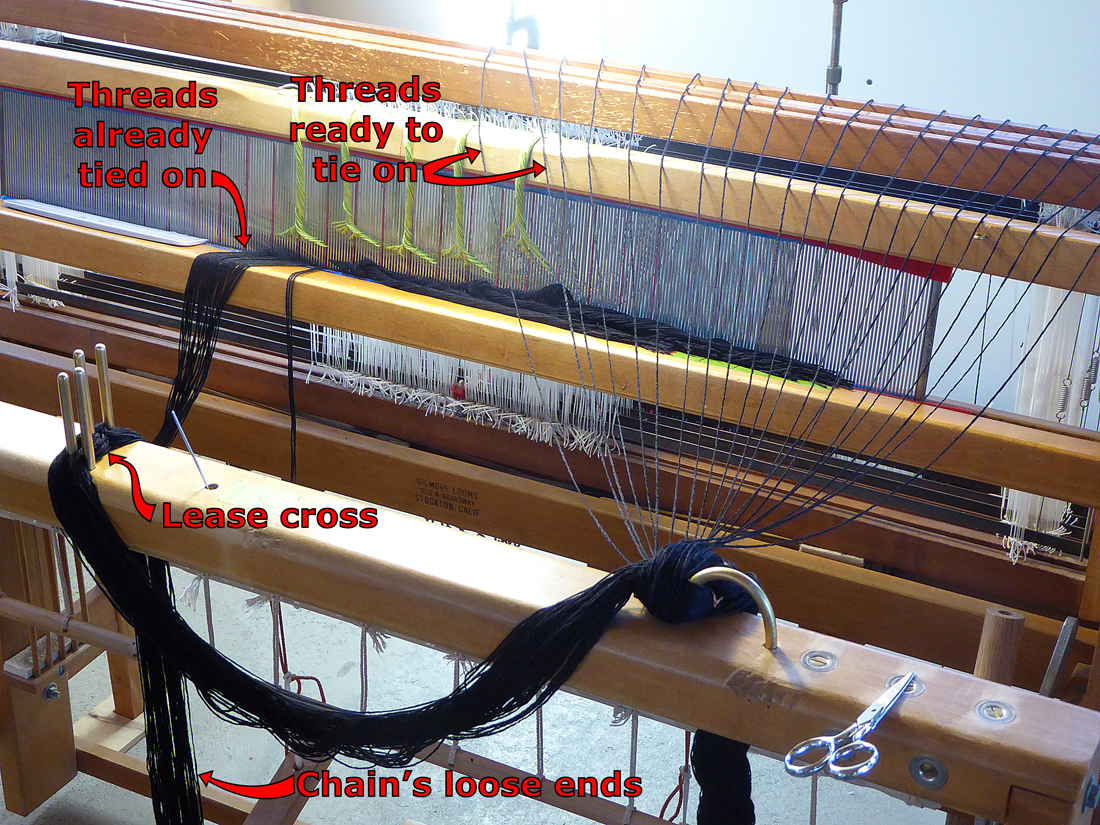
Here is the chain, its individual threads beginning to be tied onto the ends of the previous warp. Black threads go on first. The chain is captured on the front beam by an upside down U-shaped hook, its left leg pinning through one of the chain's bights. From here it goes over to the left, to the vertical pins that maintain the lease cross.
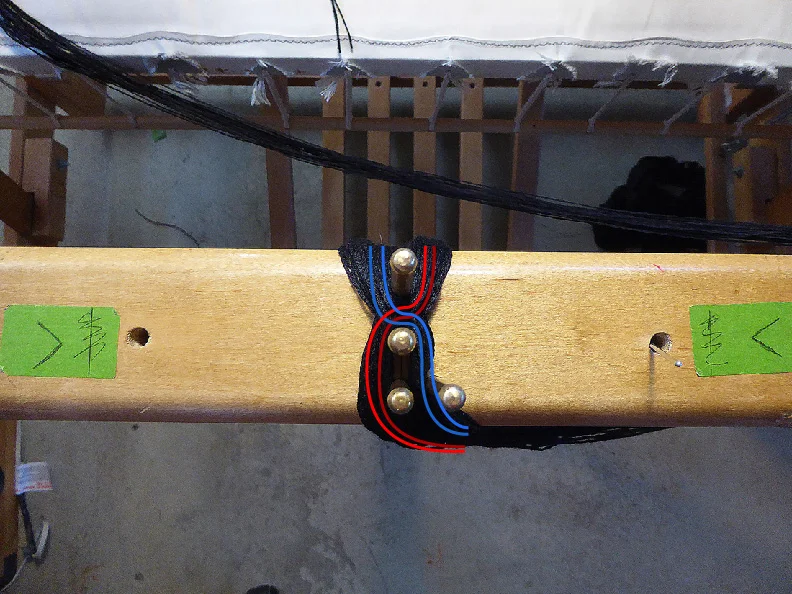
Here is a close-up of the lease cross, the graphic lines showing how the threads cross over one another, keeping each individual thread untangled from the next. When the warp is combed out just before actually winding it onto the back beam, this detail right here, right now, reduces the hassle-factor BIG TIME. Small effort up front equals big payoff later on (weaving is chock full of life lessons).

Here is the bamboo yarn for the body color wound onto the warping board.
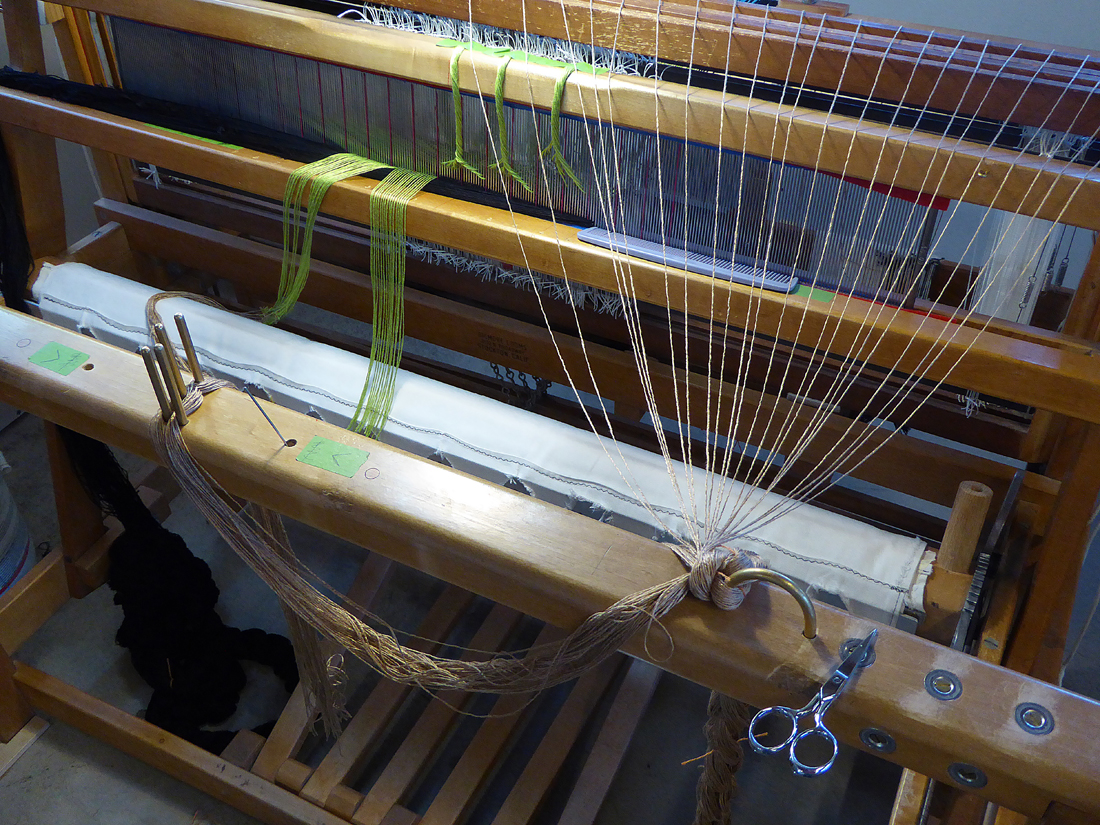
Here is the body color being tied on. The black threads (or ends) are all pulled over to the left to get them out of the way.

The warp, both black and body color, is beginning to go over the breast beam and through the reed. The left half has been literally combed out, enabling it to run freely through the reed and the heddles. The right half is still as-is, just as it pulls out of the two chains of warp yarn.

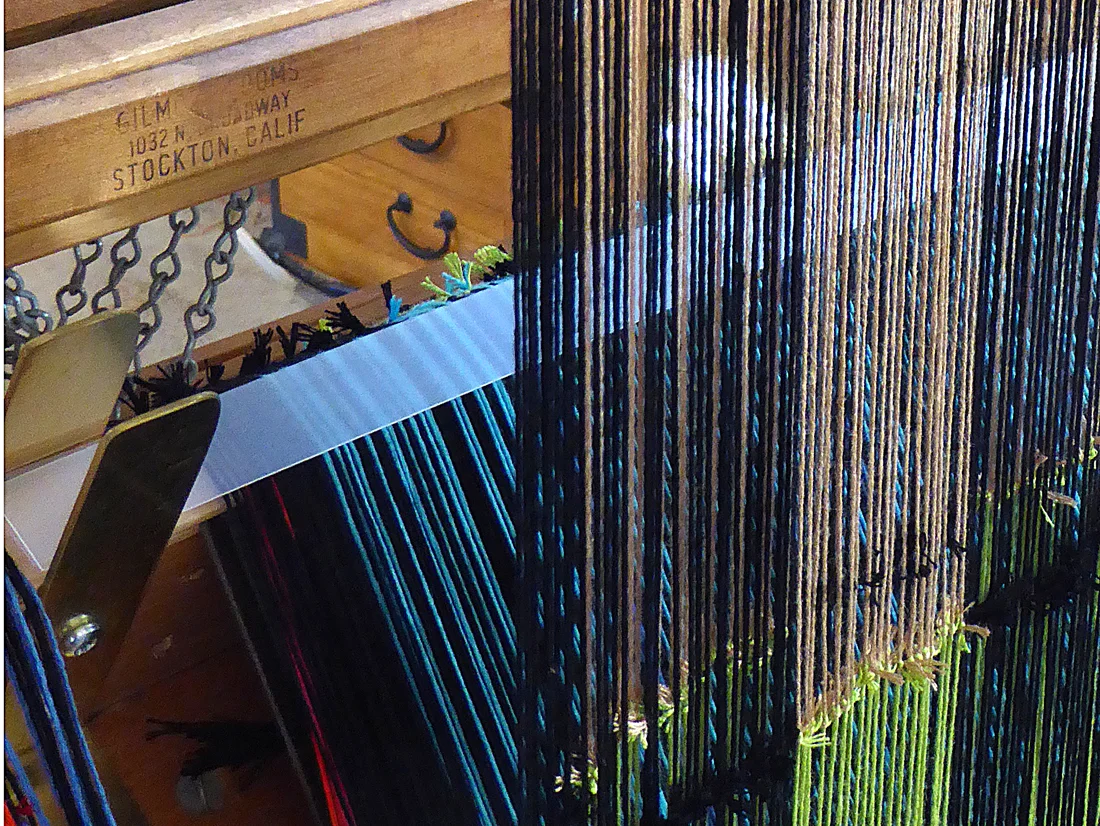
Here is the warp as seen from the back side, emerging from the heddles (the white, string-like things), and into the network of the lease sticks. This gizmo is just a group of sanded dowels that make each thread go up-and-over, down-and-under, etc. This makes for a consistent tension on each end as it's pulled over the back beam and down onto the warp beam. Here is where you can see part of the unavoidable waste created by tying on new warps. The new warp (which you cannot see yet) is tied onto the old green warp, which is in turn tied onto an even older blue warp. Eventually this leftover yarn will build up so much on the warp beam it will all have to be pulled back through, back-to-front, and cut off. It looks really cool, but we have no idea what to do with it. All the knots from all the tie-ons make it pretty much unweavable.

Here is the new tan warp coming through. The regularity of the colors going through the lease sticks is a fairly good indication that the tie-on was done correctly. It's not a sure thing, but odds are.... Also, this is the third of the four chances to Spot the Knot. As the ends are pulled through, down, and around, sometimes the irregularity of a knot will be seen. If a knot is spotted, R makes a note of its color, dent, and scarf number. At the appropriate time in the weaving process, the flawed end will be cut and pulled, and a proper end put through in its place. Yes, it's a hassle. But the bamboo scarf comes out flawless. You will never know; we won't tell. (The fourth, and final, chance to Spot the Knot is during the weaving process. If you see that bad boy coming at you, you have to splice in the repair. It is a huge hassle, sucking up vast amounts of time, and it does make a short length of double-up yarn that is visible in the finished scarf. It is not a flaw--a flaw would be a knot left in, barely visible, that would pop sooner or later--but it is an imperfection. Structurally, the scarf is better off for the repair; but we prefer not to interrupt the clean, crisp geometry of our designs. It's just an occasional peculiarity of the craft. That's life.)

The new warp is coming down off the back beam and is about to be wound onto the warp beam. The remains of numerous past warps are already on the warp beam; you can see the green one going on, the blue under it, a red under that, etc. We be jammin'.
Here is a detail of the previous image. Here's where R's practical OCD comes into play, for your benefit. Pamela winds her warp on just-like-that, pretty as you please--no worries! Not so much for R. Here is what he has found he has to do to keep thread tensions all sama-sama. The frosty thing is a strip of polycarbonate film. It is there to keep any thread from worming its way down amongst its mates, bollixing up the tension in the process. There are, truth be told, many irregularities that will, literally, come out in the wash. But a major tension variation? Nope. See?: OCD has an upside.

The warp going on will have two colors of scarves on it: tan and green. Here we have come to the end of the tan ends. These ends need to be evened up before we wind and tie on the green body color. We're just going to take a little off the end. This won't hurt a bit.

Easy-peasy. BTW: the cutting mat is bridging between the breast beam and the shuttle rail of the beater. The mat is sitting right on top of all the black ends.

Here is the warp's second color wound onto the warping board. We'll chain it up, cut it off, tie it on.

Here is the very end of the entire warp, including the black ends. Again, we have to trim all of these off in order to complete the front tie-on.
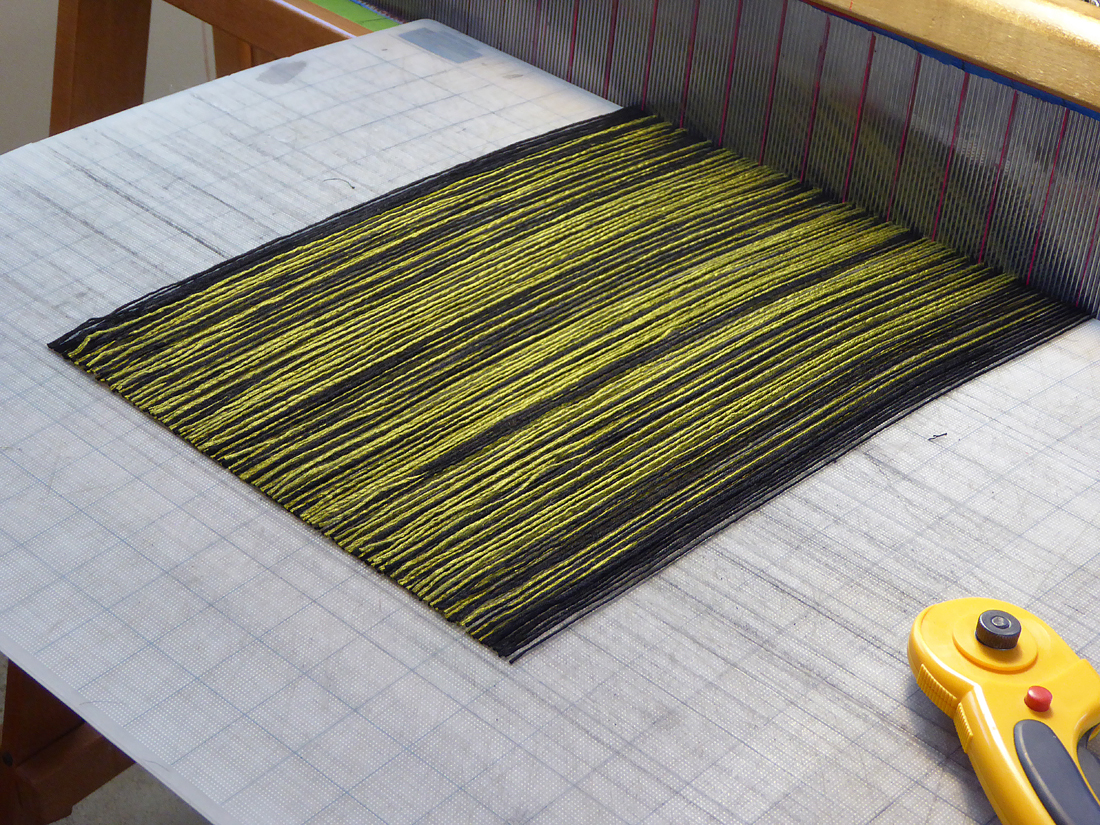
Well, there you have it. Now you can see why we put in a fudge-factor when winding the black warp (and colors too, to some extent). The very shortest thread at the end determines the maximum cut-off length of the entire warp. Generally speaking, pandering to the least is not a good plan; but here it is unavoidable--hence the early workaround to compensate for the less-than-optimal warping board.

Here the warp is being tied onto the front. P grabs and ties--and has no problem with that; R likes equal-number groups. Quelle suprise!
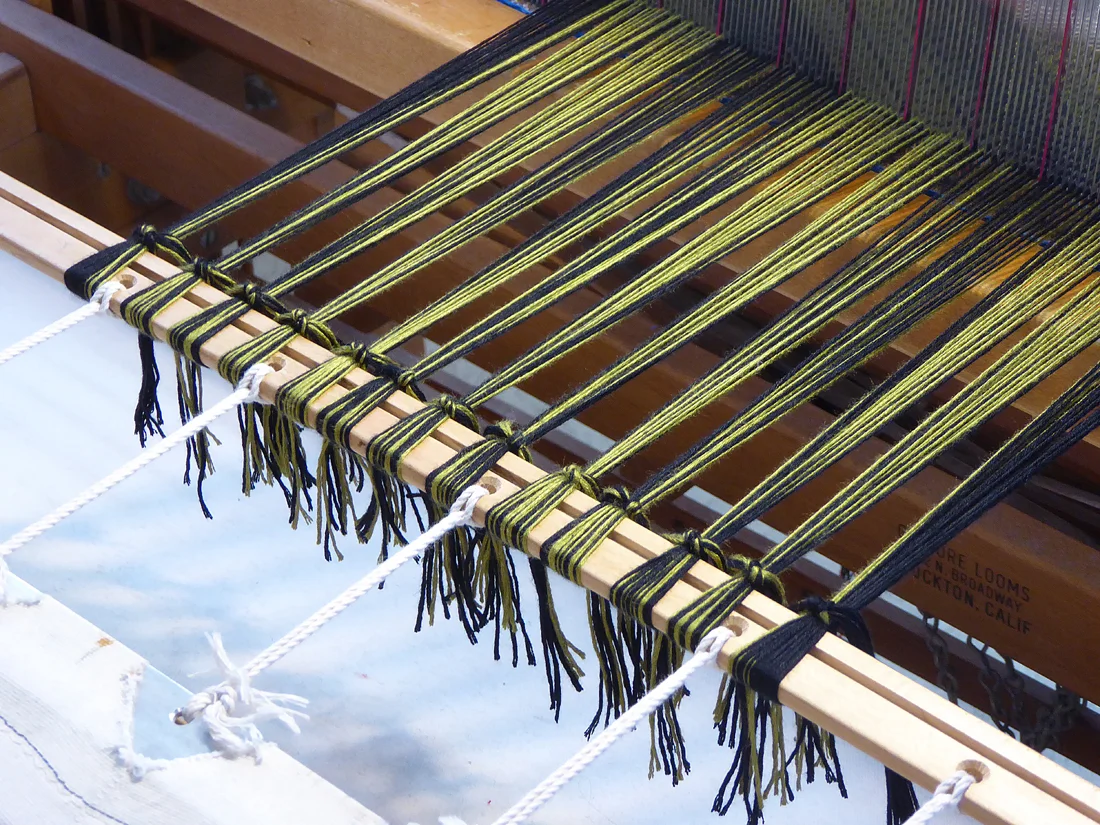
Here we are, all tied on, with the bundles as evenly tensioned as practicable.

Ready to weave--sort of. Just past the tie-on knots, you see some junk yarn woven in. The point of this is twofold: even out the spacing of the ends, spreading them out from their tie-on bundles; keep this end of the warp from falling apart when between being taken off the loom and end-stitched. Past the junk yarn R has put in a couple of polycarbonate spacers. This creates a small length of unwoven fabric which will eventually become the bamboo scarf's fringe. P uses the traditional torn sheeting for this purpose. R? Not happenin'.
As stated: ready to weave, really. Throw shuttle from right to left; beat. Repeat. Throw shuttle from left to right; beat. Repeat. Repeat, entire, some hundreds of times and--Bob's your uncle!--a handwoven bamboo scarf!